Компьютеры Intel Mac не могут работать с Windows 11 без этого обходного пути
Для установки Windows 11 требуется процессор с поддержкой TPM 2.0 и совместимая материнская плата, но в настоящее время она не полностью доступна на компьютерах Mac. Но — есть обходные пути.
В четверг Microsoft анонсировала Windows 11 с совершенно новым пользовательским интерфейсом и улучшенными функциями многозадачности. Одно требование — необходимость поддержки TPM 2.0 — может помешать компьютерам Mac когда-либо официально запускать ОС.
Некоторые компьютеры Mac поддерживают TPM 2.0 в процессоре, но в настоящее время ни один из них не поддерживает его на материнской плате. Это может быть невозможно в программном обеспечении, но для того, чтобы Intel Mac официально запускал Windows 11, Apple придется обновить Mac для этой совместимости, или Microsoft придется удалить это требование.
Короче говоря, на данный момент нет официальной поддержки для запуска Windows 11 на Mac.
Минимальные системные требования для Windows 11
Прежде чем пользователи попытаются установить Windows 11, сначала проверьте совместимость. Независимо от используемых обходных путей, для запуска операционной системы должны быть соблюдены минимальные требования.
Системные требования для Windows 11:
«Современный 64-разрядный процессор» в соответствии с тактовой частотой Microsoft 1 ГГц 2 ядра 64 ГБ памяти 4 ГБ RAMUEFI, поддержка Secure Book и 2,09-дюймовый дисплей TPM с разрешением 1366×768 Графика, совместимая с DirectX 12 / WDDM 2.x
Требование Microsoft TPM 2.0 и другие требования ограничивают поддержку процессоров теми, которые были поставлены примерно за последние шесть лет. Линейка Mac от Apple соответствует большинству этих спецификаций в своей конфигурации по умолчанию, появившейся несколько лет назад, но ограничение TPM 2.0 затрудняет определение совместимости.
Следующие Mac являются первыми моделями с TPM 2.0 в ЦП.
MacBook (Retina, 12 дюймов, 2017 г.) MacBook Air (13 дюймов, 2017 г.) MacBook Pro (15 дюймов, 2016 г.) MacBook Pro (13 дюймов, 2016 г., четыре порта Thunderbolt 3) MacBook Pro (13 дюймов, 2016 г.) , Два порта Thunderbolt 3) Mac mini (2018) iMac Pro (2017) iMac (Retina 5K, 27 дюймов, 2017) iMac (Retina 4K, 21,5 дюйма, 2017) iMac (21,5 дюйма, 2017) Mac Pro (2019 )
Любой Mac в линейке, выпущенный до упомянутых моделей, никогда официально не будет поддерживать Windows 11. Любой Mac, выпущенный после этих моделей, все еще работающий на процессорах Intel, будет иметь необходимые требования для запуска операционной системы, но официальная поддержка не предоставляется, и мы этого не ожидаем.
Но, используя обходной путь, пользователи могут обойти требование TPM 2.0. Это означает, что с помощью обходного пути Windows 11 будет работать на любом Mac, поддерживающем Windows 10, который соответствует другим минимальным требованиям.
Как установить Windows 11 на Mac с пользовательским файлом ISO

Создайте собственный ISO-файл для установки Windows 11 на Mac
Что вам нужно
Mac, отвечающий минимальным системным требованиям для Windows 11 Windows 10 ISO Windows 11 ISO Любое приложение для создания файлов ISO.
Обратите внимание, что Mac должен соответствовать минимальным системным требованиям для запуска Windows 11, таким как 64 ГБ памяти и двухъядерный процессор. Однако обходной путь обходит требование TPM 2.0, поэтому его можно игнорировать.
Как создать собственный файл ISO, чтобы обойти требование Windows 11 TPM 2.0
Откройте ISO-файл Windows 10 с помощью DiskImageMounter Скопируйте содержимое ISO-файла в новую папку на рабочем столе Отключите ISO-файл Windows 10 Откройте ISO-файл Windows 11 с помощью DiskImageMounter Откройте папку «sources» Скопируйте «Install.wim» на рабочий стол Отключите ISO-файл Windows 10 Редактировать расширение файла «Install.wim» с помощью «Получить информацию» в меню, вызываемом правой кнопкой мыши. Выберите «Имя и расширение» и переименуйте файл в «Install.esd». Откройте новую папку, содержащую содержимое ISO-образа Windows 10 из более ранней версии. Откройте папку «Источники» Удалить файл «Install.esd», расположенный там. Переместите новый файл «Install.esd», который вы изменили, в «исходную» папку. Используйте приложение для создания файлов ISO, чтобы преобразовать папку в файл ISO.
Установите Windows 11 из пользовательского ISO-файла в Boot Camp
Откройте Boot Camp. Выберите пользовательский ISO-файл для «ISO-образа». Нажмите «Установить».
Установщик Windows 11 должен запускаться через Boot Camp отсюда. Следуйте инструкциям на экране, чтобы запустить Windows 11.
Установщик Windows 11 Boot Camp будет открыт при первой загрузке операционной системы. Следуйте инструкциям, чтобы установить драйверы совместимости и завершить установку.
How to run Windows 11 on your M1 MacBook Pro. For free.

In my previous article I rambled about how great (for me) the new MacBook Pro with M1 Pro was. One of the negatives was the inability to run other operating systems (Windows 11, Ubuntu, etc.) natively. And my irritation is alive though somewhat soothed by the fact that I’ve found a way to run Windows 11 at near-native speed.
Yes, I know that Parallels Desktop 17 and VMWare Fusion 12 offer good & straightforward solutions to do the same, but they cost money. And if you (like me) are not ready to cough up that min $79 tax for a transient fantasy, here’s what you can do.
Step 1: UTM is your friend
UTM has been around since Feb 2020 with the goal to run Virtul Machines on iOS devices. Opportunity strikes in November 2020 with Apple introducing the wonderful M1 CPUs based on Arm64 architecture. UTM could thus be extended to also work on Macs with the new silicon.
How To Create A Windows 11 Bootable Usb On Mac 3 Ways
Try it out now! Instead of upgrading, performing a clean installation of Windows 11 is the method that yields the finest results when obtaining the operating system. Using a drive that is bootable in Windows 11, you may do this task. If you’re working with a Windows PC, making a bootable CD for Windows 11 is a pretty straightforward procedure. On the other hand, if you’re working with a Mac, the process will be a little more complicated. This post will describe how to accomplish this task without making use of a Windows-based PC or virtual machine (VM), as well as without making use of BootCamp help. Keep on reading!
Can you install Windows 11 on Mac?#
Because Windows 11 requires a physical TPM module, only Parallels allows users to install Windows 11 on a Mac at the moment. This functionality is available on both Intel and the most recent Apple Macs with Silicon M1 chips, as well as the most recent version of macOS Monterey.
Can Windows 11 run on M1 Mac?#
You are now able to run Windows 11 on your M1 Mac, which was not previously possible. Furthermore, and probably most impressively, you are able to run Windows 11 on a virtual machine on your M1 Mac. Parallels operate brilliantly on an M1 Mac in tests, therefore Windows on ARM would be installed into a Parallels Desktop virtual machine on an M1 Mac. This version of the operating system runs many popular Windows apps designed for Intel-based computers using its own emulation software. ⇒ Get Parallels Desktop 17
Can I install Windows 11 in Mac VirtualBox?#
Yes, you may use a virtual machine to install Windows 11 on your Mac if you are a user of the Mac operating system who is interested in trying out the latest version of Windows 11. Even if it is just a free one like VirtualBox. On the other hand, you should be aware that VirtualBox will only function properly on Intel-based Macs. In order to install Windows 11 on an M1 Mac, you will require Parallels Desktop. You may make use of a fascinating feature known as virtualization if you are using Windows 11 Pro or a later version (or Hyper-V on Windows). Virtualization makes the creation and usage of virtual computers inside the context of the host operating system possible.
Will Windows 11 be a free upgrade?#
It is at no cost. However, the upgrade will only be available to Windows 10 personal computers that are running the most recent version of Windows 10. And that has hardware that satisfies the minimum requirements. In the Windows 10 settings, under Windows Update, you may check to see if you have the most recent updates available. Take note that in locations where Internet usage is measured, fees from your Internet service provider may be necessary.
Is Windows 11 worth installing?#
The upgrade to Windows 11 comes with a number of benefits. Some of these include a slicker new interface, improved security, updated applications, and information widgets. PC users no longer have an excuse to feel inferior when confronted with the sophisticated user interfaces of their friends’ macOS and Chrome OS devices. Windows 11 is every bit as polished as its predecessor. With the exception of the occasional appearance of an archaic Control Panel dialog box. The design is pleasant to look at thanks to the rounded window edges, the tiny Taskbar, and the touch-friendly layout. The OS is safer than before and a significant portion of this may be attributed to the fact that it calls for the utilization of a trustworthy processor known as a Trusted Platform Module. Despite the greater security, this new requirement caused many Windows commentators to raise their hackles. Because certain older PCs would not be able to run the new operating system. This being said, let’s see how you can create a Windows 11 installation media from Mac in three straightforward ways. Keep on reading!
How can I create a Windows 11 installation media from Mac?#
1. Use the Terminal#
Connect your USB stick to your Mac.
Open the Terminal app by clicking on the launchpad icon in the Dock. Type Terminal in the search field then select the result with its name.
Install HomeBrew on your Mac by pasting the following command and pressing Enter: curl -fsSL -o install.sh https://raw.githubusercontent.com/Homebrew/install/HEAD/install.sh
Enter the following command to finish the HomeBrew installation:/bin/bash install.sh
Next, install wimlib by using the following command: brew install wimlib Wimlib library support the Windows Imaging File Format (WIM). Which allows users to create, alter, extract, and mount WIM files:
Type diskutil list and press Enter to bring up a list of all drives on your Mac. Note down the USB stick’s disk identifier that will either be: disk2, disk3, disk4 etc…
Use the following command to format your USB stick and make sure to replace diskname with your disk’s name: diskutil eraseDisk MS-DOS WINDOWS11 GPT /dev/diskname
Head to Microsoft’s page for the Windows 11 download and select Windows 11 multi-edition under the Disk Image(ISO) section.
Select the language you want for your OS then click on the 64-bit download button. SPONSORED
Mount the ISO file from your Downloads folder by using the following command and press Enter:hdiutil mount
Next, copy the ISO file into your USB stick with the following command:rsync -vha –exclude=sources/install.wim /Volumes/CCCOMA_X64FRE_EN-US_DV9/* /Volumes/WINDOWS11 Keep in mind that the name of the file must exactly match the one that is shown (CCCOMA_X64FRE_EN-US_DV9). If it is different (due to a different choice in language), be careful to alter it in accordance with the difference.
Split and copy the install.wim file since it is larger than 4 GB with this command:wimlib-imagex split /Volumes/CCCOMA_X64FRE_EN-US_DV9/sources/install.wim /Volumes/WINDOWS11/sources/install.swm 3000
That’s it! Now you have a Windows 11 USB installer on Mac. You can use it to install Windows 11 on any device you want.
You can easily create a Windows 11 bootable USB on Mac using the built-in Terminal. After you finish installing a few needed tools, you need to download the Windows 11 installation media from the official Microsoft page and copy it to your USB. The process is not very complicated. Nevertheless, one of the drawbacks of using this technique is that the installation takes up 5.2 gigabytes of space on your computer. It is not possible to burn a file that is larger than 4 gigabytes on a device that is formatted in FAT32. As this is the only format that is compatible with both Windows and macOS. In order to get around this issue, you may break the installer down into several smaller files. To do this, you will need to install a package manager called wimlib, which can be done using Homebrew. During the process of making the bootable CD, the Windows installation file will be divided.
2. Use Boot Camp#
There is no need for any long Terminal instructions or third-party software. Because Boot Camp Assistant can be used to install Windows on a Mac and build a bootable USB installation drive. However, on M1 Macs, this approach does not appear to be accessible. Therefore, for them, you need to use the first method to create a Windows 11 bootable USB on Mac.
3. Use a third-party app#
The UUByte ISO Editor is a robust application for Windows and Mac that can be used to manipulate ISO files. Because of the burning function, creating a bootable USB or DVD from an ISO image of Windows is quick and simple. You are able to decompress the ISO image and extract its contents to a local disk thanks to the extracting capability. In addition to that, it contains tools for the generation and manipulation of ISO images, that are easy to use. Both of the approaches outlined above are free to use and are compatible with Intel and M1 Macs. If, on the other hand, you would rather not use Terminal and instead have an experience based on a graphical user interface (GUI), you may use UUByte ISO Editor, which costs $29.95 but offers a free trial. The application offers comprehensive compatibility for a variety of Mac models and releases of macOS, and it makes it simple to produce a Windows 11 installation USB flash drive.
Is Windows really better than Mac?#
When it comes to hardware, you receive a lot more for your money if you purchase a personal computer (PC), whether it be a desktop or laptop. There is a large amount of price disparity due to the fact that there are thousands of different PC systems and thousands of different stores selling them. On the other hand, Macs have a price that is virtually always the same, which means it is less likely that you will get a bargain. The video game business is a massive one. Computer games are getting increasingly complex, and in order to play them, you need a significant quantity of storage space and a graphics card that is at the top of its class. A PC computer that has the necessary hardware to run contemporary games may be purchased for the same price as a Macbook, which is not capable of running any of the most recent video game titles. Additionally, the Mac OS is not compatible with a large number of video games. The efficiency of the virtual memory in Windows is significantly higher than that of Mac. A computer with insufficient memory will operate more slowly, but it won’t crash entirely. A Mac that is running out of memory is in danger of crashing significantly more frequently. This indicates that a Windows PC may function reliably with a lower amount of RAM than before. We recommend that you do not miss out on our performance and security-wise comparison between Windows 11 and Mac in order to decide which one fits you better.
Why can’t I upgrade to Windows 11?#
In addition to the usual requirements for your CPU, GPU, and RAM, Windows 11 demands that you have TPM 2.0 and Secure Boot installed on your system to provide the highest possible level of security. If you do not fulfill these requirements, the upgrade process will be a tad more complex. Check out our post on how to install Windows 11 without TPM 2.0 and Secure Boot. The user interfaces of Windows 11 and macOS share a lot of similarities, and with the new design that has rounded edges, the user interface of Windows 11 looks more like macOS than it ever has before. However, that is not all. The Dock-like Taskbar that was formerly located at the bottom of the screen has been moved to the middle of the screen in Windows 11, making it appear as though Microsoft is modeling its design after that of Apple. Was this guide useful to you? Did you manage to create a Windows 11 bootable USB on Mac? Let us know by leaving a comment in the section below and sharing your thoughts with us. Thanks for reading!
SPONSORED Name * Email * Commenting as . Not you? Save information for future comments
Comment
How to Install Windows 11 on Mac without Boot Camp
If you’re a Mac user and want to install Windows OS, you have to use Boot Camp, a utility that comes with Mac to let you switch between macOS and Windows OS. It helps you download drivers and create partitions to install Windows on Mac. However, Boot Camp doesn’t support the latest Windows 11 OS and hence you need another way to install Windows 11 without Boot Camp.
In this tutorial, we will see how we can install Windows 11 on Mac without Boot Camp. By following the tutorial, you can also install older versions of Windows OS.
Download Windows 11 ISO
A Windows ISO image lets you clean install Windows on your computer. ISO files are disk images to create bootable USB drives and discs. They are also used to boot a virtual machine. Microsoft is offering a free upgrade for all Windows users. Meanwhile, you can skip the product key part during the installation of Windows 11 from the ISO file.
The easiest way to download the ISO file is directly from the official website. Follow the instructions below to download the Windows 11 ISO.
Step 1: Go to the Windows ISO download page.
Step 2: Select Windows 11.
Step 3: Click on Download.
Step 4: Select the language and Click on the download button.
How to Install Windows 11 on Mac without Boot Camp
1. Create Windows Bootable USB Installer
You need to create a Windows 11 bootable USB installer. A flash drive is needed for this and you need to follow the steps below:
Step 1: Format Bootable USB Drive
Format your USB Bootable drive with Master Boot Record (MBR) Scheme and exFAT partition.
 Format USB Bootable in Disk Utility
- Open Disk Utility, go to Application > Utilities > Disk Utility
- Click on View > Show All Devices
- Choose the Windows USB Bootable and click on Erase
- select MBR and Click the Format menu and choose the exFAT.
- Enter your Windows USB drive
- Click on erase button.
Step 2: Mount Windows 11 ISO
Double-clicking on the Windows11.iso file to mount this image to your Mac.
 Mount Windows 11 ISO Image on macOS Monterey
Step 3: Create Windows 11 Bootable USB Installer
You can use Terminal in Mac to create a bootable Windows USB Installer. To open Terminal. Go to Application > Utilities > Terminal or open macOS Spotlight and search "terminal". Use this command to create Windows Bootable USB.
 Create Windows 11 USB Installer on Mac
2. Create Windows Partition on Mac
Step 1: Open Disk Utility by navigating to Application > Utilities> Disk Utility. Click on the Show button and select Show all Hard Disk.
 Create a new Windows 11 Partition on Mac
Right-click on Apple SSD Hard Disk and select Partition. Click on the “+” icon to create a new partition.
 Create a New Partition for Windows
Step 2: Create a new Container disk with APFS Partition. You need 50 GB of space to install Windows.
 Create a New Container Disk with APFS Partition
Step 3: Click on new Container disk, and select Erase button to format Container disk with MS-DOS (FAT) partition.
 Erase new Container disk2 with FAT format
This is Windows partition on Mac.

Windows 11 Partition on Mac
3. Download Mac Driver for Windows
When you install Windows on Mac, you also need to download drivers for the hardware to work with the software. Since the Windows Installer does not support the keyboard and mouse on Mac, you need drivers to fix the issue.
Follow the steps below to download drivers for Mac:
Step 1: Open Boot Camp Assistant from the Utilities folder
Step 2: From the top menu bar, select Action > Download Windows Support Software. Choose the Download folder as the save destination. You need to find the drivers in the Windows Support Software folder.
 Download Windows Drivers on Mac
Step 3: Copy $WinPEDriver$ and Boocamp to your Windows USB Installer.
 Copy BootCamp to Windows USB Installer
Step 4: Open $WinPEDriver$ folder and only keep this drivers “MultiTouch, SSD, USBVHCI, SerialIO, Thunderbolt” in WinPEDriver folder. Because Windows Installer has a problem with another drivers.

Copy Drivers to WinPEDriver
5. Add Mac Driver to Windows USB Installer
Since peripheral devices such as mouse and keyboard do not work with Windows on Mac, you need drivers to troubleshoot and resolve the issue.
 Copy AutoUnattend xml to root of Windows USB Bootable
We need to download the required drivers ($WinPEDriver$) and add them to the Windows 11 bootable USB drive. To add drivers for mouse and keyboard, we will create a file called Autounattend.xml to enable the Windows installer to boot with the new drivers.
You can follow this tutorial to create a file for yourself.
How to Install Mac Drivers on Windows Bootable USB
It is easier to install all drivers needed to run Windows 11 on Mac. Hence, move the Autounattend.xml file to the root folder of the bootable USB. Now, when you install Windows from the bootable USB, the drivers will also be installed.
6. Install Windows 11 on Mac
Follow the steps below:
Step 1: Insert the Windows bootable USB into your Mac
Step 2: Restart your Mac and hold down the Option key.
Step 3: Select the EFI Boot from the Boot Assistant to start the Windows installation (Wait about 1
5 min to enter the Windows installation)
 Boot to Windows 11 USB Bootable
Step 4: Follow the on-screen instructions and proceed with the installation
 Windows 11 installation on Mac
Step 5: Bypass TPM and Secure Boot
Press “Shift +F10” to open CMD, then type: Notepad to open Notepad editor. Create a Registry file follow this:
Windows Registry Editor Version 5.00
 Create Bypass File in Notepad
Click on File and select “Save as” with “Save as type” is “All File” and File Name is “BypassTPM.reg”
 Save as Reg File
In Notepad, click on File and “Save as” again, right click on “BypassTPM.reg” and select “Merge”.
 Run Bypass TPM
Step 5: Choose the partition you’ve created to install Windows when the setup prompts you
Step 6: You will see Windows installation ask you basic questions such as location, keyboard setup, network, username, password, diagnostic information, and others. Choose your preferences and continue.
You’ll now see a clean Windows 11 desktop on your Mac. However, don’t get excited just yet. We need to install the Mac drivers to have a seamless experience of working on Windows 11 on Mac.
To install the required drivers for Windows, navigate to the “Bootcamp” folder in the bootable Windows 11 USB drive. Launch setup.exe from the Boot Camp folder and proceed with the installation. When the installation is complete, restart your device.
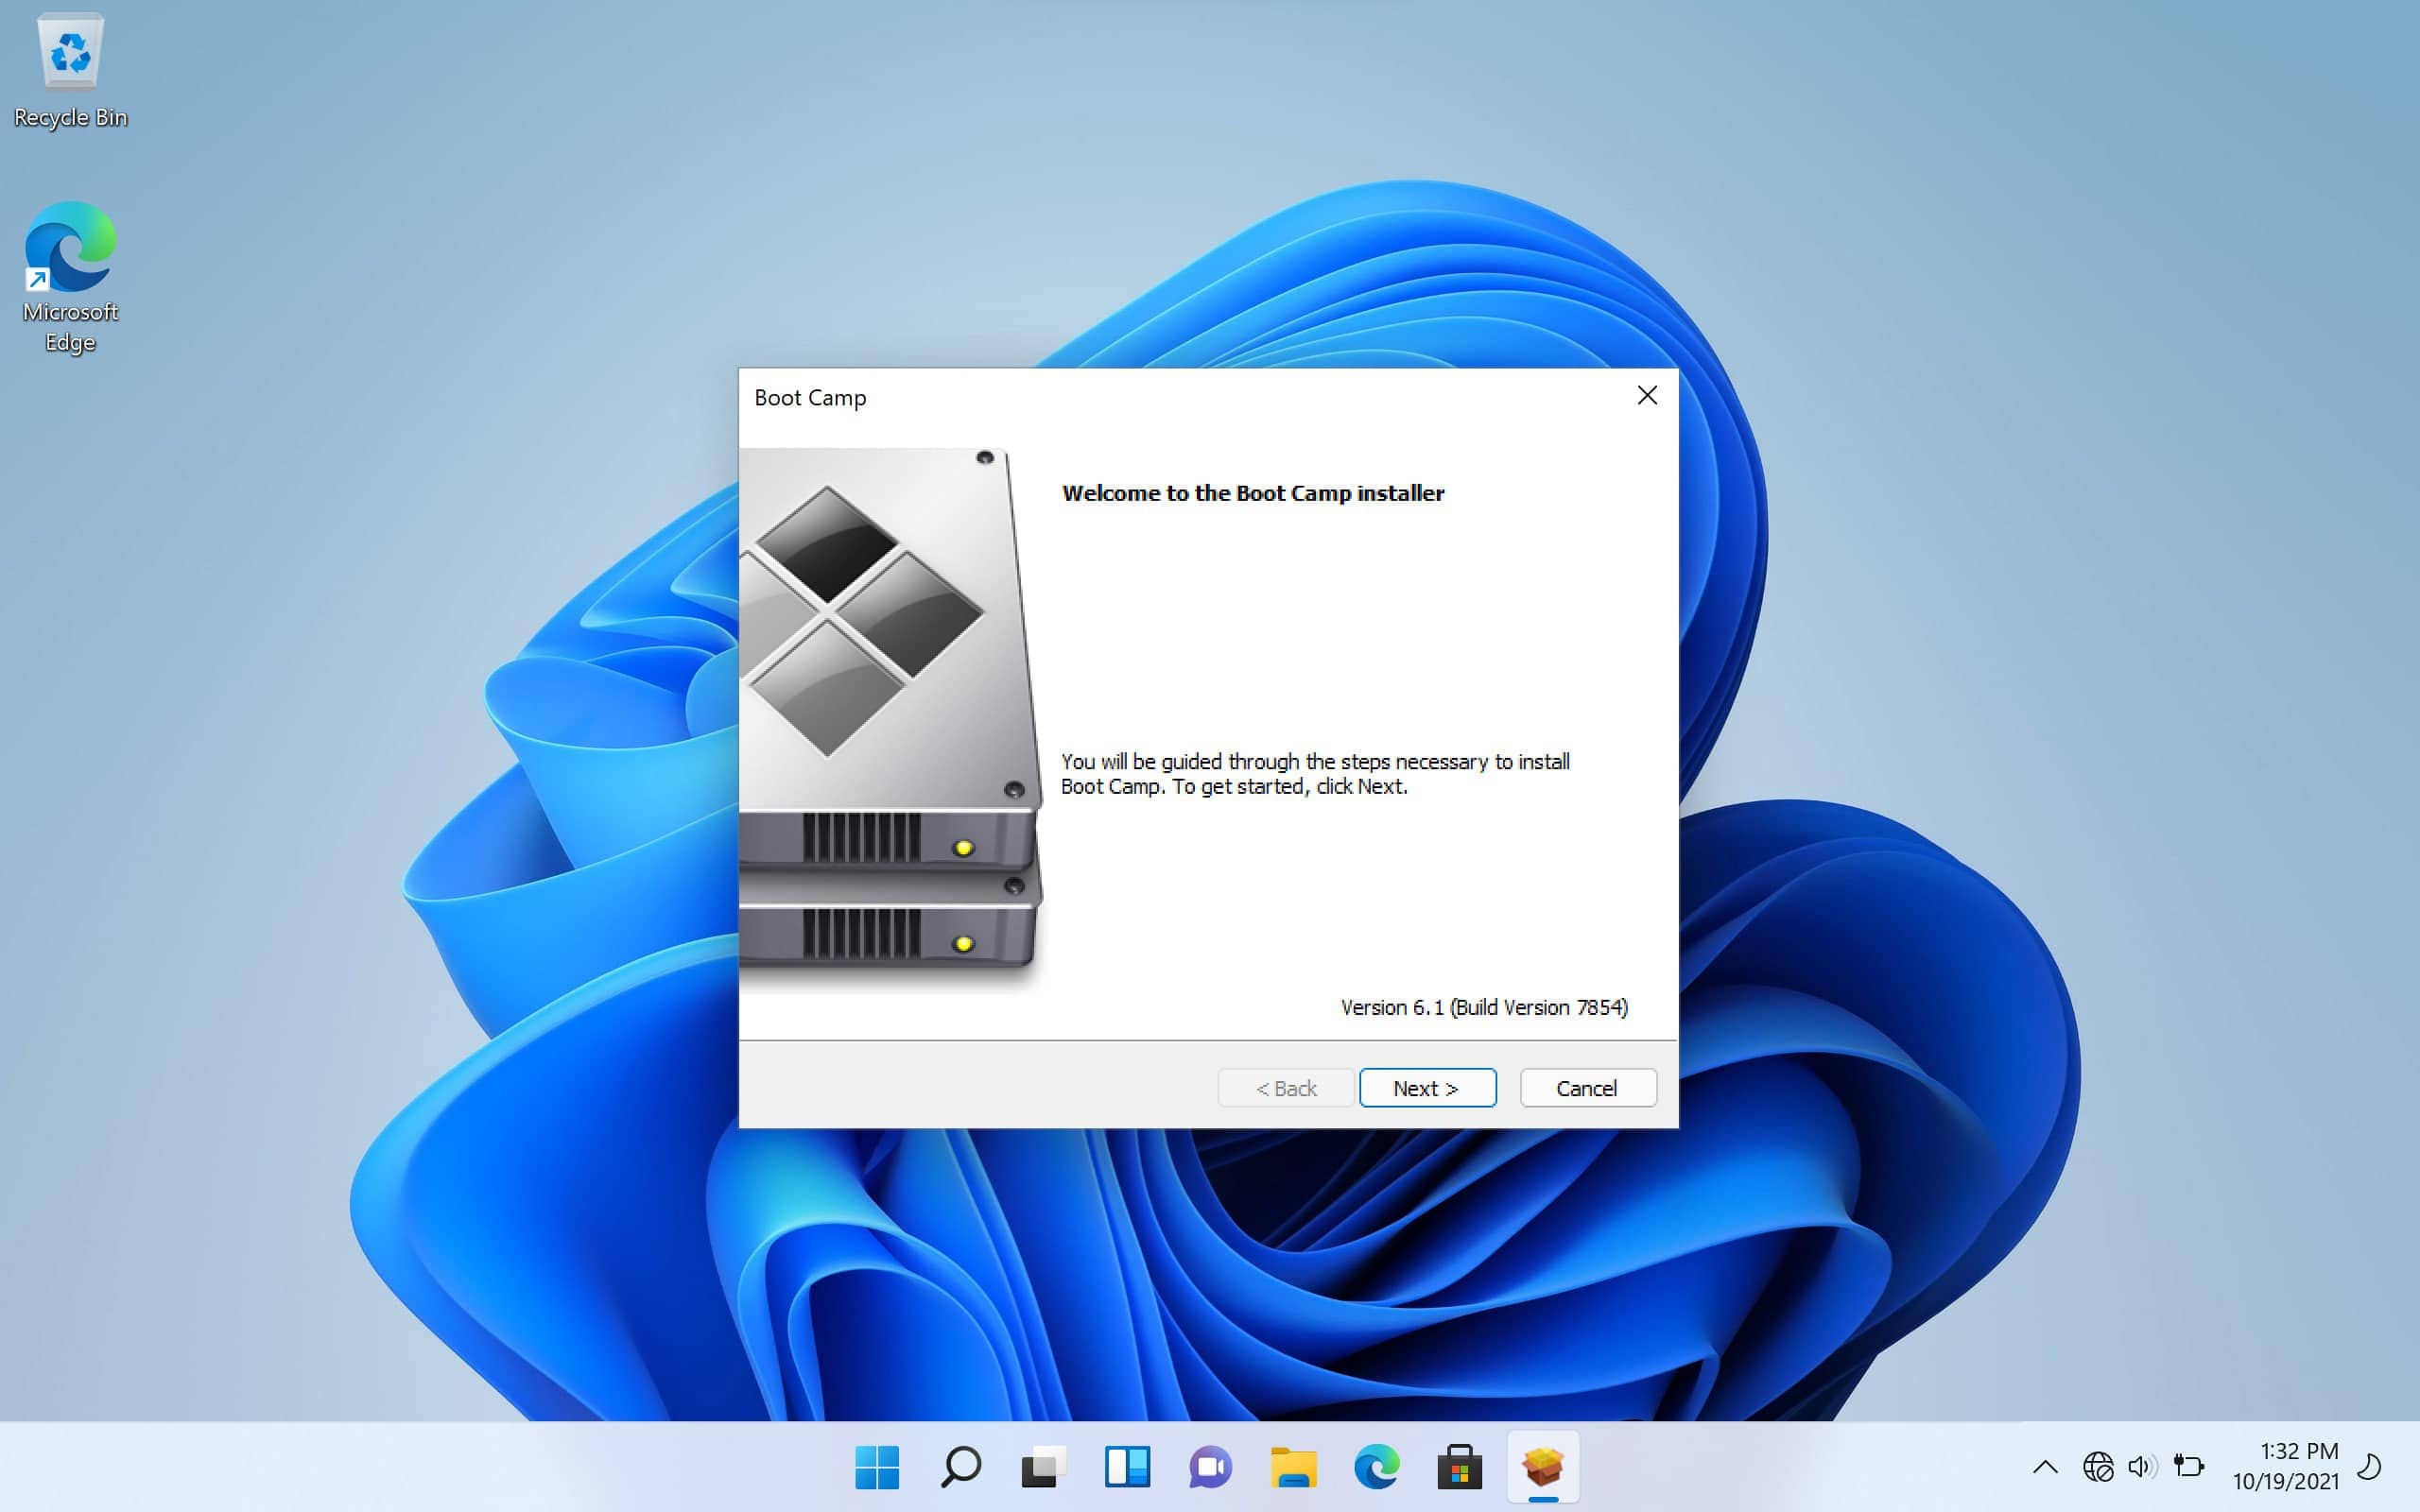 Install Drivers on Windows 11 with Boot Camp
You’ll now have Windows 11 installed on your Mac that works without any problems. Your Mac drivers will ensure there aren’t any input or network issues when using Windows on Mac.
When you want back to macOS, restart your Mac and hold Option key and choose your macOS. macOS and Windows OS, you can install Windows on your Mac and set up dual boot so that you can conveniently switch between both operating systems, depending on your needs.