Как вернуться к iOS 16 без iTunes [Решение в один клик]
Пользователи iPhone могут ожидать много изменений в своих смартфонах в ближайшие несколько дней, поскольку ожидается, что Apple представит iOS 17 5 июня на WWDC 2023. Некоторые из слухов о функциях iOS 17 Beta — это новый режим блокировки экрана, новые специальные возможности. функции, полностью обновленное приложение кошелька, новые функции SharePlay и многое другое.
Однако обновление до новой версии iOS имеет как плюсы, так и минусы. Преимущество заключается в том, что вы можете обновить свой смартфон и пользоваться всеми новыми функциями, которые может предложить ваш телефон. Тем не менее, бета-версии, такие как iOS 17 Beta, довольно нестабильны по своей природе и могут привести к нарушению использования вашего смартфона из-за уязвимостей в системе безопасности, несовместимости приложений, ограниченной поддержки клиентов и даже потери данных.
Если вы уже обновились до iOS 17 Beta и хотите знать, как вернуться на iOS 16 без iTunes, продолжайте читать!
Часть 1. Что нужно сделать перед понижением версии iOS 17 Beta
Большинство пользователей смартфонов обычно обновляют свои приложения и операционные системы, не прочитав полностью детали и изменения, внесенные в новые версии. Точно так же большинство пользователей iPhone часто обновляют свои телефоны всякий раз, когда выходит новая бета-версия iOS.
В настоящее время вводится бета-версия iOS 17, и многие люди будут обновить свои телефоны, чтобы попробовать новые функции, реализованные в этой версии. Однако эти функции понравятся не всем, поэтому они захотят вернуться к iOS 16 без iTunes. В такой ситуации вы должны быть очень осторожны на протяжении всего процесса, чтобы предотвратить потерю данных.
Чтобы откатиться с iOS 17 Beta на стабильную версию iOS 16, вам придется стереть все данные на вашем устройстве iOS. Поэтому вам придется сделать резервную копию вашего устройства, чтобы вы могли восстановить свои данные и настройки после завершения процесса понижения версии. Хорошо, что сделать резервную копию вашего iPhone довольно просто, выполнив любой из этих методов:
Способ 1: Использовать iCloud
- Подключите устройство к стабильному соединению Wi-Fi.
- Откройте настройки, коснитесь имени своего устройства и выберите iCloud.
В настройках резервного копирования iCloud вы найдете переключатель для включения автоматического резервного копирования. Используйте опцию «Резервное копирование сейчас», чтобы создать последнюю резервную копию.

Способ 2: Использовать iTunes
- Подключите ваше устройство iOS к компьютерной системе с помощью USB. На вашем устройстве и компьютере появится уведомление о разрешении подключения. Дайте разрешение на продолжение.
- Запустите iTunes и выберите вкладку «Обзор».
Используйте опцию «Резервное копирование», чтобы создать последнюю резервную копию. Вы можете создать его либо в iCloud, либо изменить параметр на «Этот компьютер».
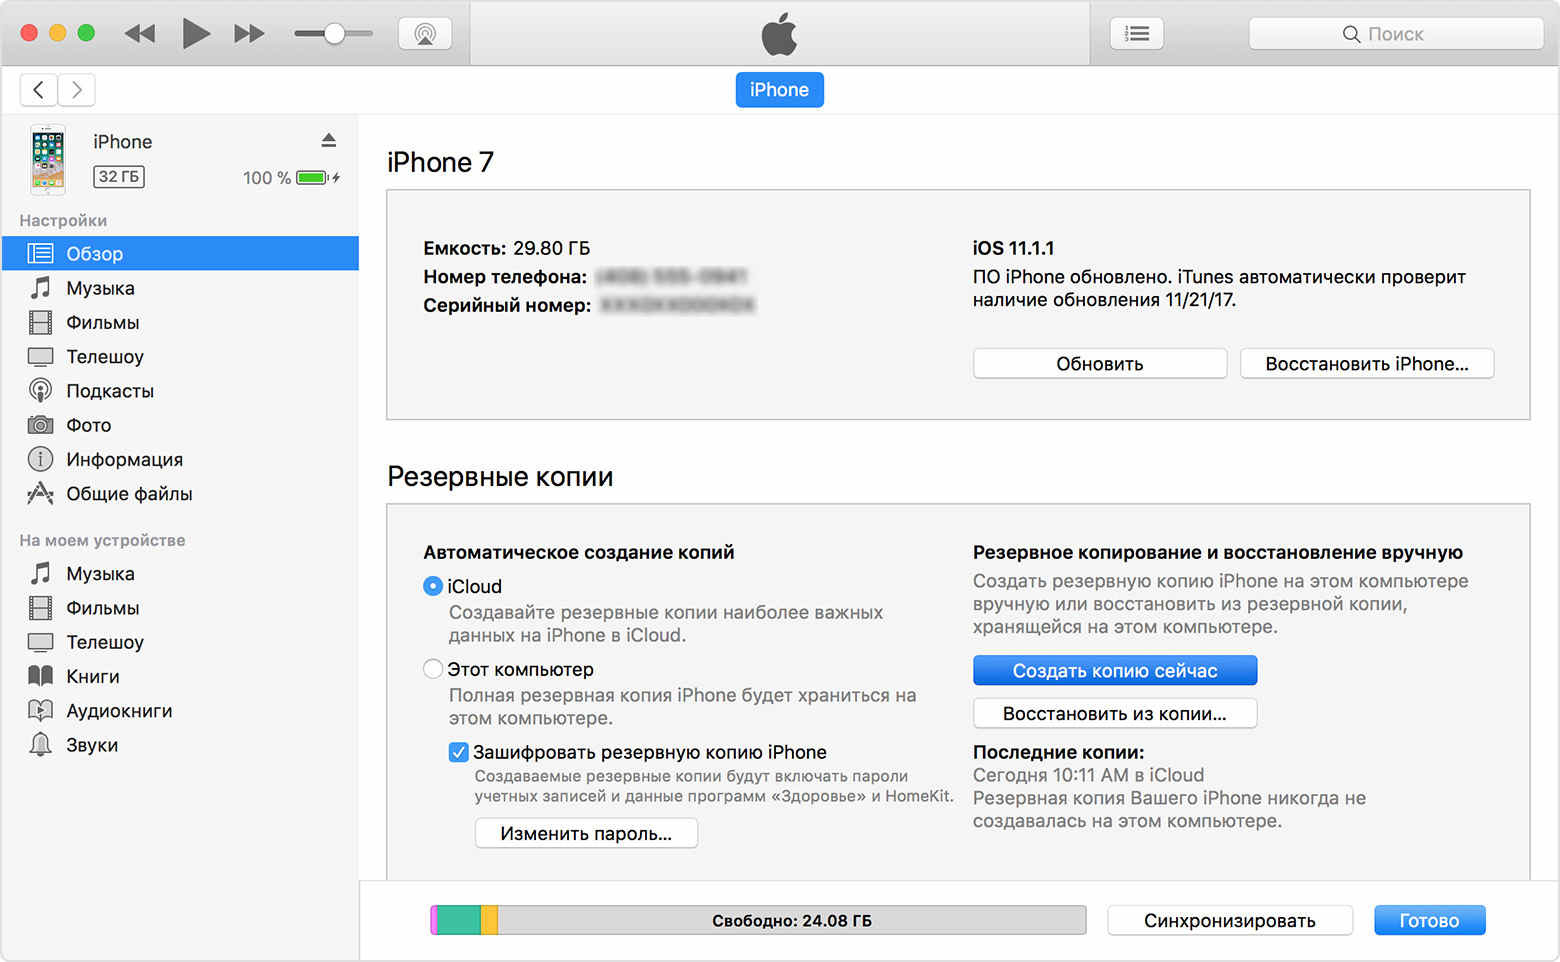
После того, как вы использовали любой из вышеперечисленных методов для резервного копирования своего устройства, вы можете перейти к следующему шагу, чтобы безопасно понизить iOS 17 Beta до iOS 16 без iTunes.
Часть 2. Один щелчок, чтобы понизить версию iOS 17 Beta до iOS 16 без iTunes
Теперь, когда вы знакомы с процессом резервного копирования вашего устройства, давайте обсудим, как понизить версию iOS 17 Beta до iOS 16 без iTunes. Для этой цели вам понадобится сторонний инструмент.
Tenorshare ReiBoot — лучший инструмент для возврата к iOS 16, потому что он быстрый, надежный и эффективный. Кроме того, он имеет мощные функции восстановления системы, чтобы гарантировать безопасное завершение всего процесса понижения версии без повреждения программного обеспечения вашего устройства.
Важно отметить, что у ReiBoot есть много других функций, помимо возможности понизить версию прошивки iOS. Некоторые из этих важных и полезных функций:
- Возможно одним щелчком войти или выйти из режима восстановления.
- Способен решить более 150 проблем, связанных с проблемами запуска, черным экраном, зацикливанием режима восстановления и т. д.
- Быстрый и простой сброс устройства iOS без iTunes.
- Комплексная поддержка всех устройств и моделей iOS.
- Возможность понижения версии устройств в течение нескольких минут без iTunes.
- Удобный пользовательский интерфейс.
Выполните следующие действия, чтобы откатиться с iOS 17 Beta на iOS 16 с помощью ReiBoot:
-
Загрузите и установите Reiboot на свой компьютер с Windows или Mac.
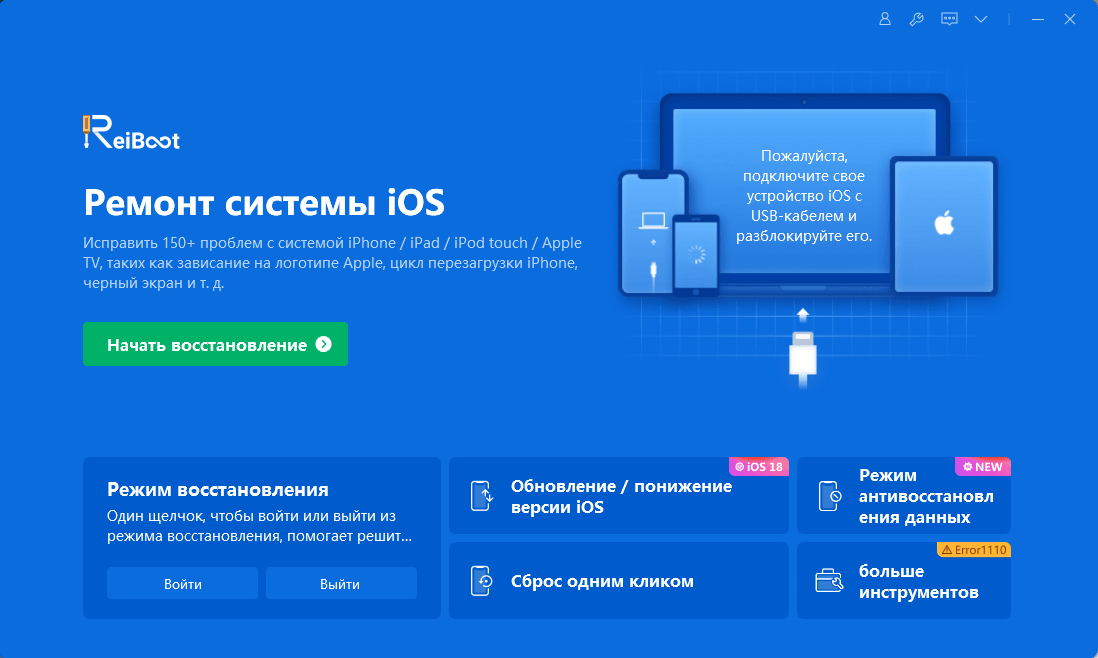
Подключите ваш iPhone к компьютеру. Откройте ReiBoot на своем компьютере и выберите «Обновление/Понижение версии ios», как показано ниже.
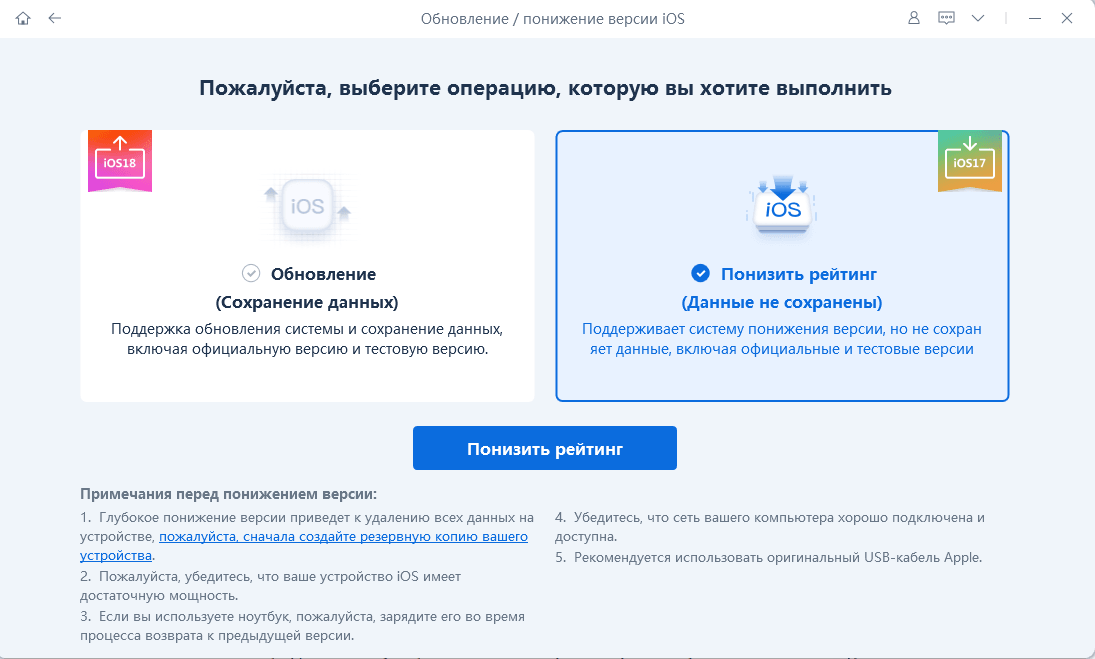
На следующем экране вы получите два разных варианта. Выберите «Понизить версию», если хотите вернуться к iOS 16. Убедитесь, что вы создали резервную копию своего устройства.
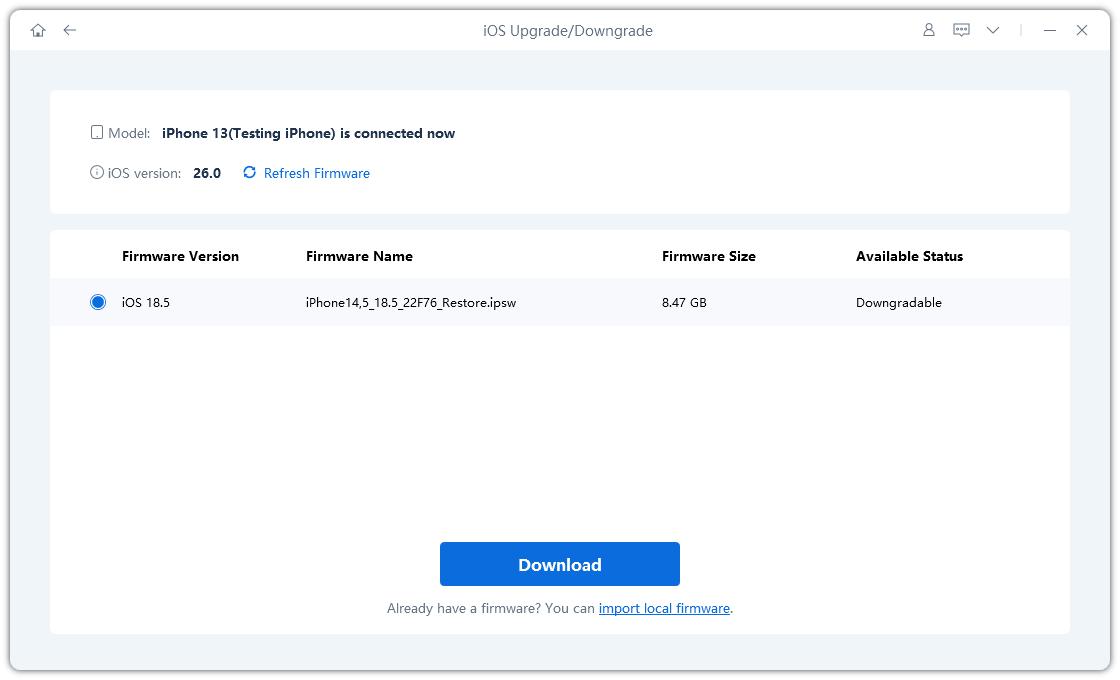
Программа автоматически определит версию iOS на вашем устройстве и предложит соответствующий файл прошивки для понижения. Просто нажмите кнопку «Загрузить», чтобы начать загрузку пакета прошивки iOS.
Нажмите кнопку «Начать переход на более раннюю версию», и весь процесс перехода с бета-версии iOS 17 на iOS 16 будет завершен в течение нескольких минут.
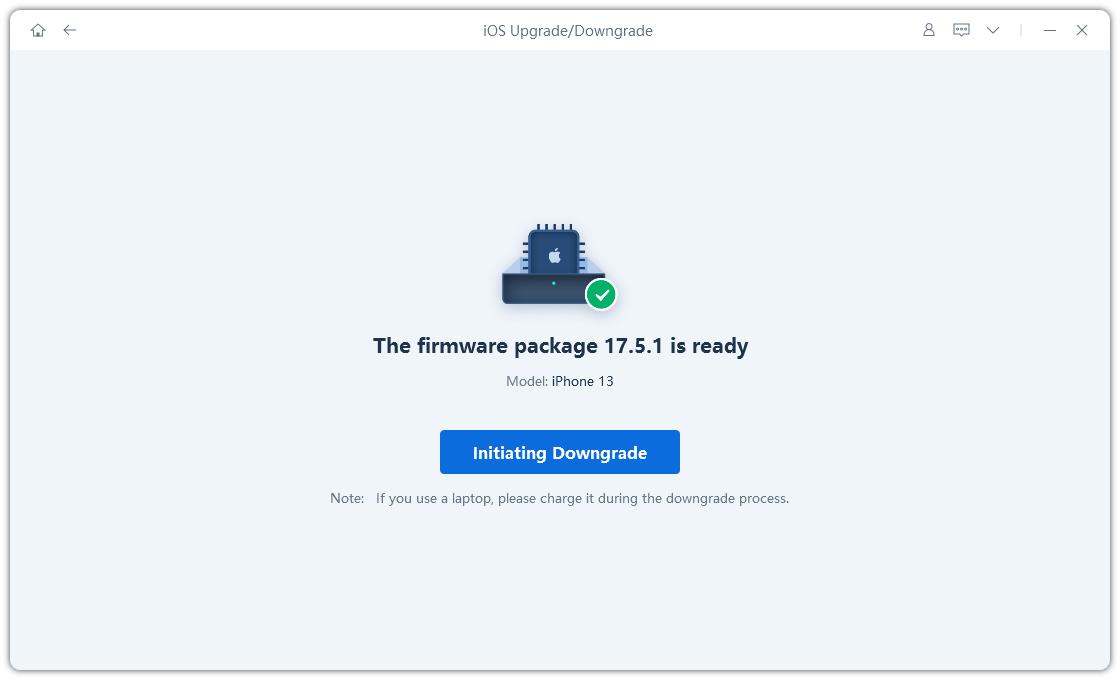
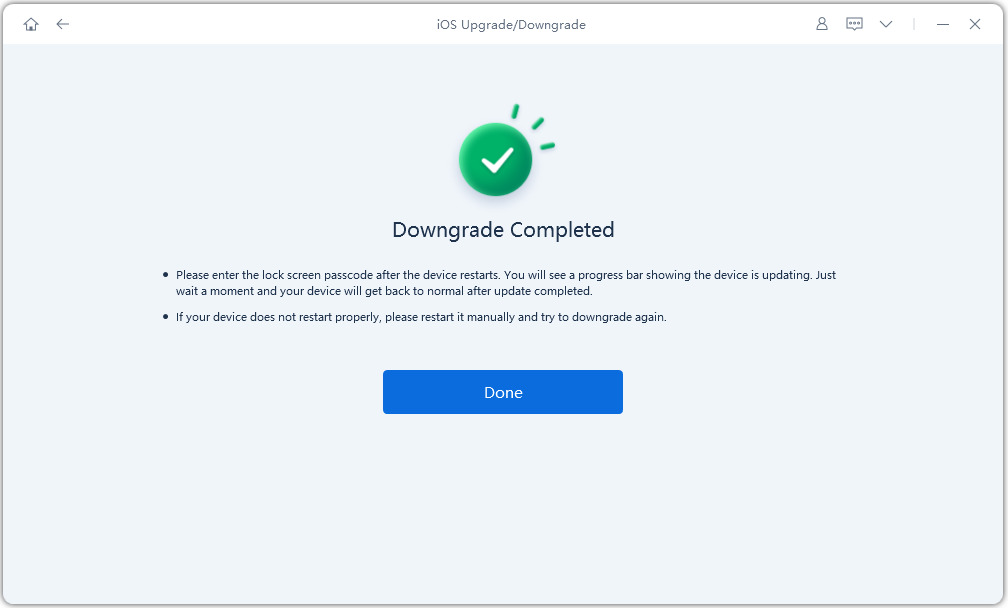
Выполнив эти простые шаги, вы сможете легко вернуться к iOS 16 без iTunes. Посмотрите обучающее видео ниже для визуального руководства.
Видеоруководство о том, как удалить iOS 17 Beta с iPhone без потери данных
Часть 3. FAQs о понижении iOS 17 Beta
1. Могу ли я вернуться с бета-версии iOS 17 на предыдущую версию iOS?
Да, вы можете перейти с iOS 17 Beta на предыдущую версию iOS, используя надежное программное обеспечение, такое как ReiBoot.
2. Могу ли я перейти на бета-версию iOS 17 без компьютера?
Понижение версии iOS 17 Beta без компьютера возможно с помощью некоторых инструментов, но не рекомендуется. При попытке понизить бета-версию iOS 17 без компьютера может возникнуть несколько осложнений, таких как потеря данных, отсутствие резервной копии или возврат к несовместимой iOS.
3. Каковы альтернативные способы вернуться к iOS 16 без iTunes?
TinyUmbrella и 3uTools — это два очень популярных инструмента, используемых для возврата к iOS 16 без iTunes. Тем не менее, вы должны знать, что многие пользователи выразили озабоченность по поводу безопасности TinyUmbrella, а использование 3uTools также слишком сложно.
Заключение
Бета-версии iOS могут показаться вам захватывающими на начальных этапах, но со временем вы, вероятно, столкнетесь с проблемами, связанными с экраном блокировки, проблемами со звуком или ошибками отображения. Поэтому вам гораздо лучше дождаться выхода общедоступной версии iOS 17.
Понизив версию своего устройства с iOS 17 Beta до iOS 16, вы можете избавить себя от множества проблем. Лучше положиться на такой инструмент, как Tenorshare ReiBoot, который отличается безупречной доступностью, эффективностью и производительностью. и безопасность. В конечном итоге это поможет вам быстро и легко вернуться к iOS 16 без iTunes.
How to Downgrade iOS 17 to iOS 16 without Losing Data (Video Guide)
On September 18th, the new iOS 17 was rolled out not just to the developers but any iPhone users. Users around the globe have reported, many iOS 17 bugs or glitches. In this scenario, you may want to know how to downgrade iOS 17 to 16/16.7. And this is the ultimate guide to help you downgrade iOS 17 to 16/16.7 on iPhone without computer or without losing data, which also supports iOS 17 beta downgrade.
Part 1: Preparing for Downgrade iOS 17 to 16 on iPhone
Before we get into the downgrading process, you must prepare your device for the downgrade process. Once you downgrade your iPhone from iOS 17 to 16, you’ll have to set it up as a brand-new iPhone if you didn’t create a backup.
It’s necessary to back up your iPhone’s data when you want to know how to downgrade from iOS 17 to 16 without losing data. Remember that the backup you create on iOS 17 won’t restore on iOS 16. For this, you’ll need to create a manual backup on iCloud, iTunes or Tenorshare iCareFone to download your phone data.
Part 2: How to Downgrade iOS 17 to 16 without Losing Data
Downgrading from iOS 17 to 16 might seem a daunting task. Even if you’re a tech-savvy person, it might feel like a risky thing to do. There is one possible ways that you can downgrade iOS 17 to 16 on iPhone without computer. However, tools can make it easier and can make this process quite easier for you. There are mainly two best tools that you can use to downgrade iOS 17 to 16. Don’t worry, if you feel inconvenient and puzzled about the method, here is a step-by-step video guide for you:
Now, let’s have a look at them one by one and the methods to do so:
Way 1: [Basic] How to Downgrade iOS 17 to 16 using iTunes
Besides taking backups and restoring your iPhone using iTunes, you can also use iTunes to downgrade from iOS 17 to 16. Here’s how:
First, go to the IPSW Download, and download the firmware for your iPhone model. Make sure to select only signed iOS as they’re verified and signed by Apple.
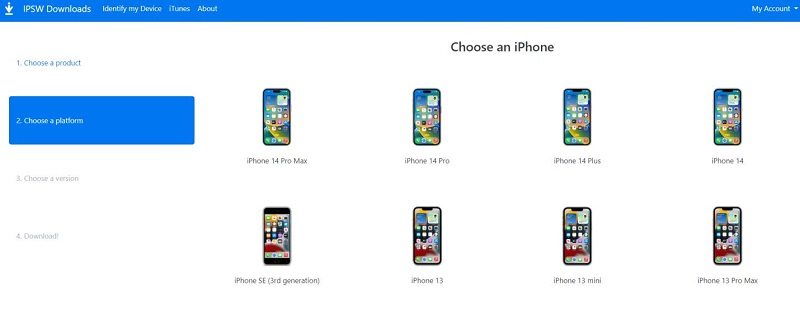
Note: You can downgrade from iOS 17 to only iOS 16.7 with iTunes.
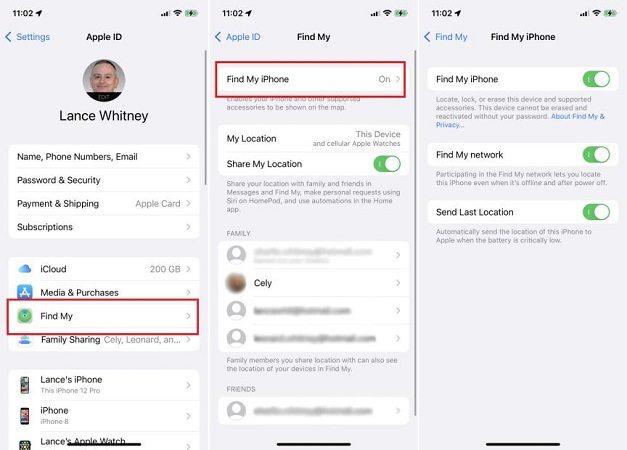
The next step is to turn off your device’s Find My iPhone feature. Go to Settings >> Tap on your iCloud Profile >> Find My >> Find My iPhone >> Turn off the Find My iPhone.
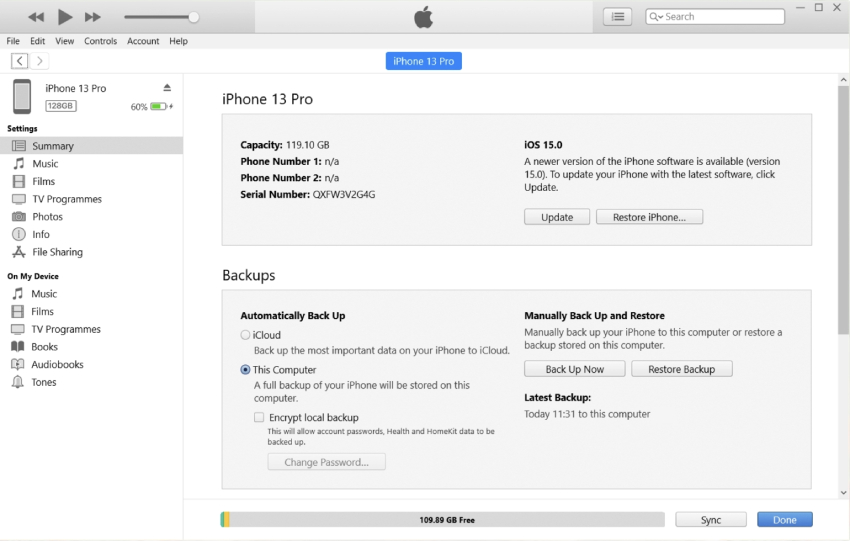
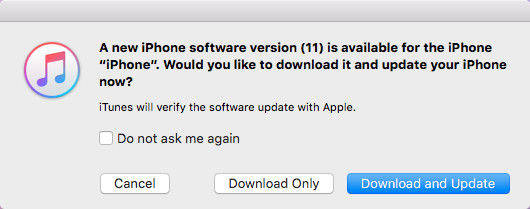
Click on the tiny iPhone icon in iTunes, and trust this device. Also, tap on the Trust This Computer option on the iPhone’s screen, and enter a passcode. Now, open iTunes on the computer and hold the “Shift” key on the keyboard. Now, click “Restore iPhone”. A window will pop up on the screen. Choose the downloaded IPSW file.
Way 2: How to Downgrade iOS 17 to 16 without iTunes [Safe,Fast,No Jailbreak]
If downgrading via iTunes seems complex and lengthy, Tenorshare ReiBoot is the best option. It minimizes the efforts and steps you typically need to follow to downgrade your iPhone from iOS 17 to 16 by automating the process.
Moreover, it also acts as a troubleshooter to fix bugs, errors and glitches your iPhone got due to the installation of iOS 17. It’ll automatically fix them in the downgrading process. It can handle 150+ iOS related issues, such as iPhone stuck on the Apple logo, black screen and freezing issues.
Here’s how to downgrade iOS 17 to 16 using the Tenorshare ReiBoot:
Download and install the Tenorshare ReiBoot process on your computer. Launch it and connect your iPhone to the computer using the appropriate cable. Click the iOS Upgrade/Downgrade option on the program’s main screen.
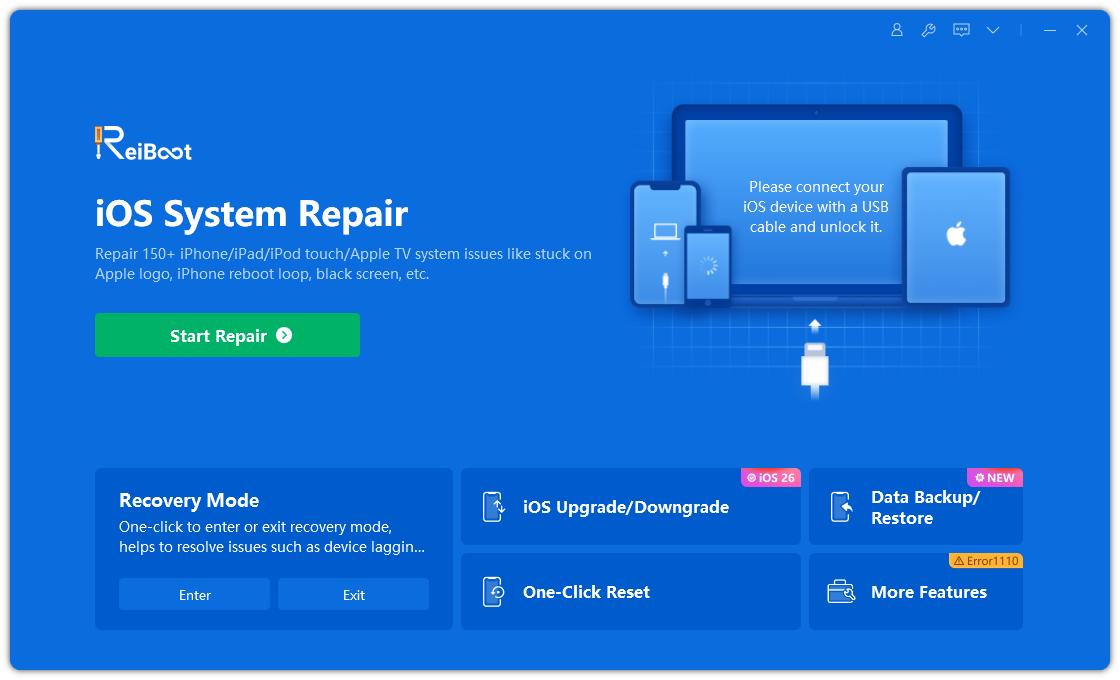
Choose the Downgrade option and click the Downgrade button at the bottom of the screen.
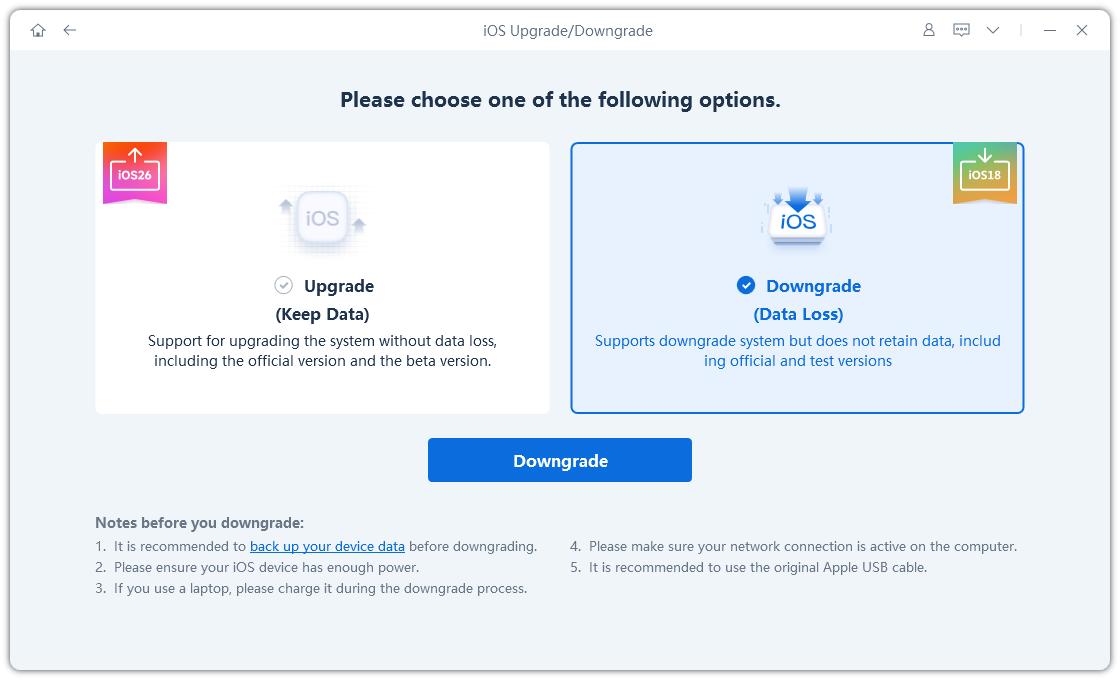
Next, the program will ask you to download the firmware package you want to downgrade. You don’t need to visit any website. The program will show you all the available firmware packages for your iPhone model. Click on the Download button to get the latest iOS firmware package. Currently iOS 16.7 is available.
Once the firmware package has been downloaded, click the Initiating Downgrade button to start the process. Hit the Confirm button, and it’ll start the downgrading process on your iPhone.
5.Let the whole process complete, and don’t interrupt it. Once the downgrading process is completed, your iPhone will reboot, and Tenorshare ReiBoot will show a Done message.
Way 3: How to Downgrade iOS 17 to 16 without Computer
How to downgrading iOS 17 to iOS 16 without a computer can be a bit more challenging, as it typically requires the use of a computer, iTunes or third-party tools like Tenorshare ReiBoot. However, there is one potential method you can try, although it is not officially supported by Apple. Please note that this method may not work for everyone and can carry some risks. Here are the steps:
Step 1: On your iPhone, open Safari or any other web browser and search for «iOS 16 IPSW download.»
Step 2: Look for a reputable website that offers iOS firmware downloads, ensuring that you select the correct firmware file for your specific iPhone model.
Step 3: Download the iOS 16 IPSW file to your iPhone. Go to «Settings» on your iPhone and navigate to «General» -> «iPhone Storage.»
Step 4: Locate the iOS 17 profile in the list and tap on it. Select «Delete Profile» and confirm the removal.
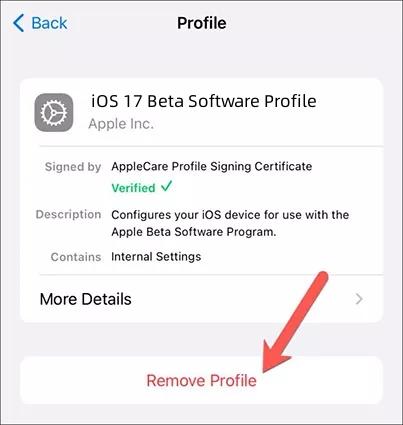
Step 5: Restart your iPhone. Open the Files app on your iPhone and navigate to the folder where you downloaded the iOS 16 IPSW file.
Step 6: Tap on the IPSW file to initiate the installation process. Follow the on-screen instructions to complete the installation of iOS 16 on your device.
| Success Rate | Difficulty | Required Time | |
|---|---|---|---|
| Tenorshare ReiBoot | 100% | Easy | Short |
| iTunes | 70% | Complex | Long |
| Remove Profile | 80% | Complex | Short |
| Other Downgrade Tools | 80% | Easy | Long |
Part 3: How to Restore Backup after Downgrading iOS 17 to 16
If the roll back to iOS 16 is complete, you need to restore yout previous iPhone backup. Follow the steps below if you backed up on iTunes:
- Connect your iPhone to your computer and open iTunes. Click on the iPhone icon in iTunes.
- Go to the Summary page. Under the «Backups» section, click «Restore iPhone».
- Choose the iOS 16 backup you want to restore. Click «Restore» and confirm your choice.
Wait for the restoration process to complete. After the iPhone restarts, you’ll see the iOS 16 interface.
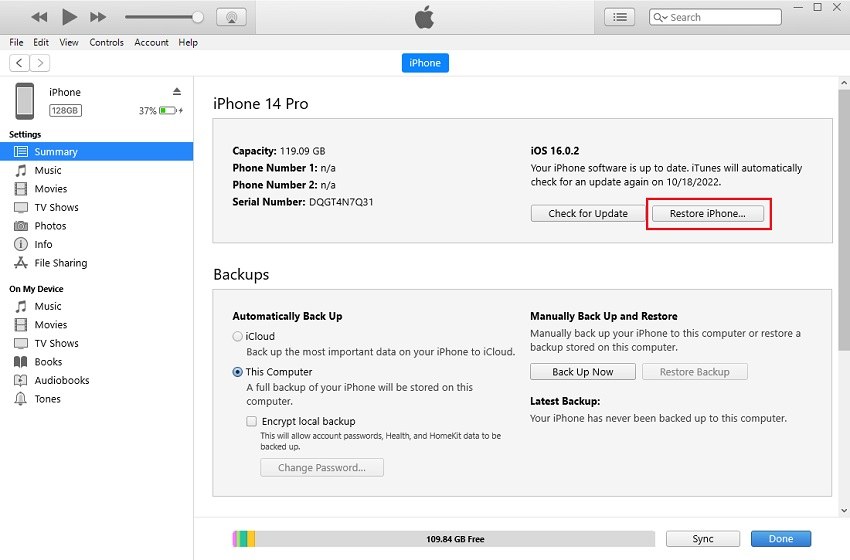
Note: Make sure you have the latest version of iTunes installed on your computer. You can download it from the Apple website if needed.
Follow the steps below if you backed up on iCloud:
-
On your iPhone, go to «Settings» > «General» > «Reset» > «Erase All Content and Settings.»
Set up your iPhone as new and choose «Restore from iCloud Backup» during the setup process.

Part 4: Benefits of Downgrade iOS 17 to 16 on iPhone
Since iOS 16 is available in the most stable form compared to iOS 17, there are certain benefits you’ll enjoy by downgrading to it. Let’s look at what you’ll be getting after downgrading your iPhone from iOS 17 to 16.
1. Improved Performance and Stability
iOS 17 is in its first official version phase, which means it’s still developing. The beta updates will likely bring bugs and unexpected errors affecting the OS’s overall performance and stability.
If you faced any performance issues or sluggishness on your device while performing day-to-day tasks, it’d be fixed after downgrading to iOS 16.
2. Better Battery Life
The more optimized the OS is, the better battery juice you will enjoy while performing day-to-day tasks. iOS 16 is available in a stable form, which means it will give you increased battery life compared to the iOS 17 .
However, to keep enjoying the iOS 17 features, you’ll have to compromise on the battery life until Apple rolls out the iOS stable 17 fully functional version in September 2023.
3. Compatibility with Older Apps
As the iOS 17 is the latest iOS version, it’ll take time for the app developers to make their apps compatible. After the iOS 17 , you might experience app crashing issues, apps not opening, or features not working properly. For now, until the iOS 17 fully functional version is released, downgrading to iOS 16 will translate into more compatibility of the OS with the apps.
FAQs about iOS 17 Downgrade to 16 on iPhone
Q1: Will I lose my data when moving from iOS 17 to iOS 16?
YES. Downgrading from iOS 17 to 16 can be a complex process, and it’s important to note that there is definitely a huge risk of data loss during the downgrade process. Therefore, before proceeding, make sure to backup your device to iCloud or iTunes to ensure you have a copy of your important data.
Q2: iOS 17 VS iOS 16
The latest iOS version is always the best choice to install on your iPhone. The newer the iOS version is on your iPhone, the more stable, compatible, and feature-rich it will be. However, when it comes to iOS 17 VS iOS 16, iOS 17 definitely offers new features. But they aren’t available in their best form. So, until the iOS 17 stable is released, iOS 16 should be your first choice unless you’ve multiple iPhone devices.
Q3: Tips for a successful iOS 17 downgrade
To make your downgrade from iOS 17 to iOS 16, keep in mind the following tips to make it successful:
- First of all, make sure to back up your iPhone’s data. This is essential before downgrading from iOS 17 to iOS 16, as you’ll lose all the data on the device.
- The second important thing you should take care of is a downgrade to the iOS version that Apple still signs.
- Use the right way and tool to downgrade from iOS 17 to iOS 16. There are many of them; however, iTunes and Tenorshare ReiBoot are the verified methods.
Q4: How to downgrade iOS 17 to 16 with Mac Finder?
Downgrading iOS 17 to iOS 16 using Mac Finder is a complex process. Here’s a step-by-step guide:
1. Open Finder on your Mac (or iTunes on Windows PCs). Connect your iPhone or iPad to your computer using a Lightning cable.
2. Place your device into recovery mode. Press and quickly release the volume up button, then press and quickly release the volume down button. Finally, press and hold the side button until the recovery mode screen appears.
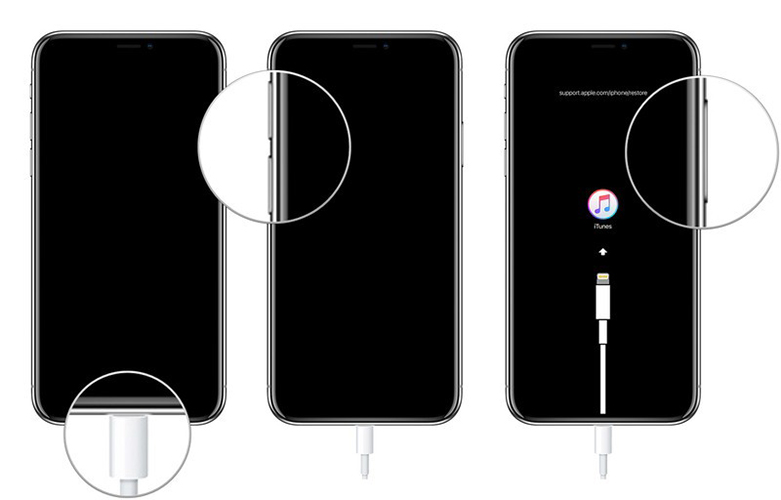
3. Then a pop-up windows will appear, prompting you to restore your device. Click «Restore» to initiate the process, which will wipe your device and install the latest public release of iOS 16. Wait patiently for the restore process to complete.
Q5: Is ReiBoot safe to downgrade iOS 17 to 16?
Of course yes, ReiBoot is a safe and reliable third-party tool for downgrading iOS 17 to 16. With just a few clicks, ReiBoot can help you safely revert to iOS 16 from the iOS 17 and iOS 17 beta version. It is highly regarded and trusted by millions of users. However, it’s crucial to take appropriate measures to back up your device’s data before proceeding. By using a professional tool like ReiBoot, you can simplify the process and avoid unnecessary complexities or troubles. Rest assured that ReiBoot provides a secure and effective solution for downgrading your iOS version.
Final Thought
iOS 17 has many new features to offer, but it’ll take time until it’s available in a fully functional form. The users using the iOS 17 might be facing performance, battery or app compatibility issues and may want to downgrade to the previous iOS.
This guide was all about how to go back to iOS 16 using the top best methods. If you aren’t tech-savvy, Tenorshare ReiBoot is the convenient and hassle-free way to downgrade iOS 17 to iOS 16/16.7 without technical knowledge, also including any iOS 17 beta version.
Как откатиться с iOS 17 на iOS 16. Инструкция
 В закладки
В iOS 17 оказалось мало существенных нововведений, пользователи слабо оценили такой апдейт. Однако некоторые все же решили обновиться, чтобы протестировать операционную систему.
Если вас она полностью не устроила, всегда можно откатиться на прошлую версию iOS. Помните, что в ходе этой процедуры вы лишитесь всех нововведений обновления, а сама она занимает немало времени. Если это вас не пугает, продолжайте.
Процедура имеет свои особенности из-за исчезновения ряда популярных приложений из App Store. Вам придётся переносить такие программы вручную после отката прошивки.
1. Сделайте полную резервную копию iPhone
Лучше, если вы сделаете копию на компьютере. Он будет актуальным для текущей версии прошивки и не затрется следующими копиями в облаке.
Для создания бекапа потребуется подключить iPhone при помощи кабеля и открыть Finder или iTunes в Windows. Там увидите подключенный смартфон и кнопку Создать резервную копию сейчас для создания полной резервной копии.
2. Сделайте бекап в iCloud
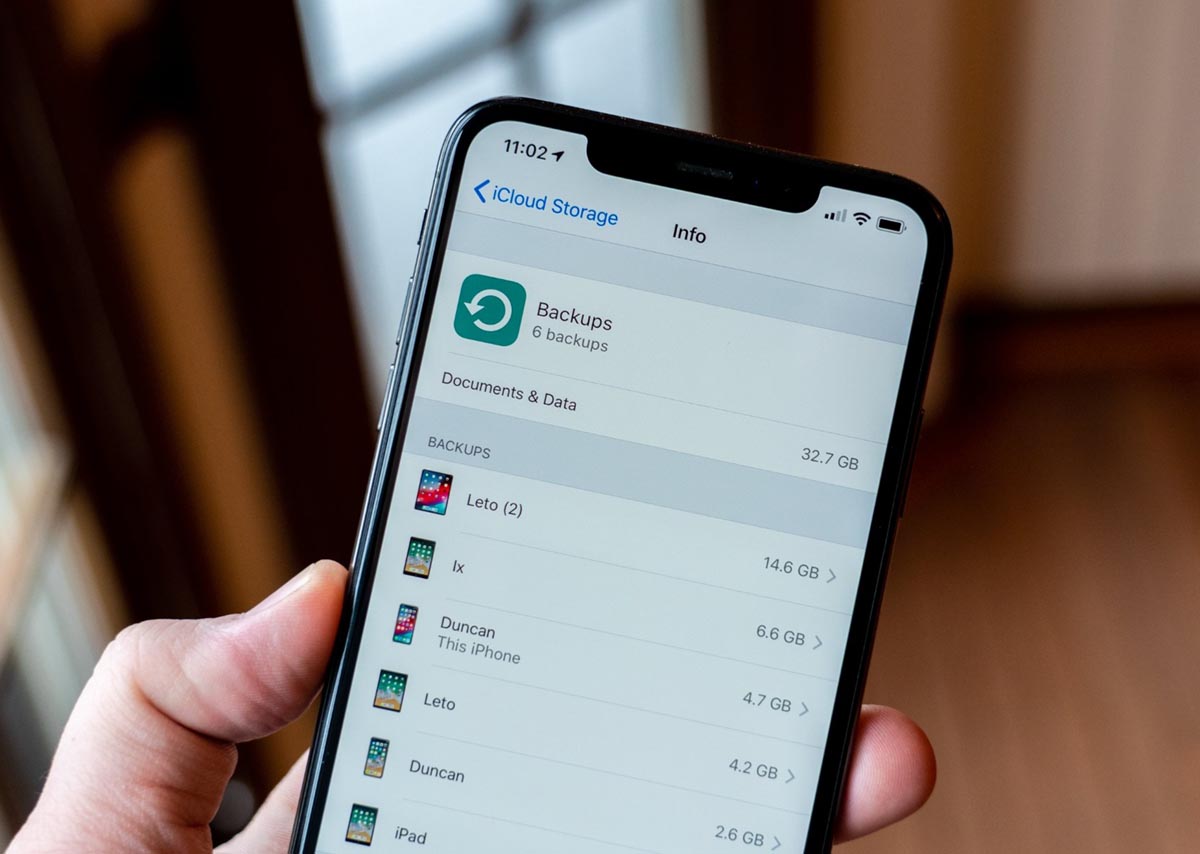
Если возможности сделать полный бекап устройства нет, создайте облачную копию в iCloud.
Имейте в виду, что здесь копии перезаписывают друг друга. Вы не сможете сохранить отдельную копию для нужной вам версии системы на будущее.
Для создания такой копии потребуется перейти в Настройки –> Apple ID –> iCloud -> Резервная копия в iCloud и обновить актуальный бекап.
3. Сохраните удаленные из App Store приложения на компьютер
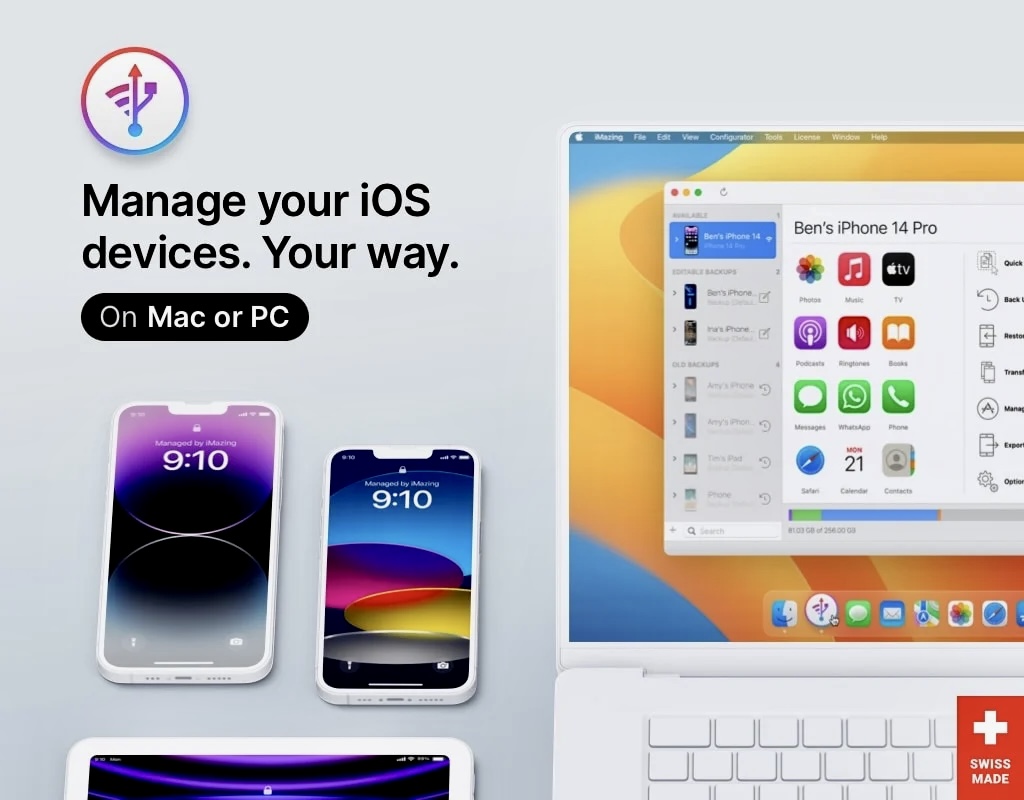
Для этого подойдет утилита iMazing. Программа доступна для macOS и Windows, бесплатной демонстрационной версии будет достаточно для наших нужд.
▶ Установите и запустите программу на компьютере.
▶ Подключите iPhone при помощи кабеля.
▶ Откройте раздел Управление приложениями – Устройство.
▶ Найдите нужную программу и выберите пункт Создать копию данных приложения из контекстного меню.
Каждая утилита или игра будет сохранена в формате *.imazingapp
Важно: лучше сохраните приложения таким способом, иначе их не получится восстановить на устройстве из App Store. Там этих программ попросту может не оказаться даже в разделе Покупки.
4. Качаем iOS 16.5 для своего iPhone
Скачать iOS 16.5 для нужного смартфона можно на сайте ipsw.me.
Выбираете вашу модель и качаете IPSW-файл. Это и есть наша прошивка.
5. Ставим прошивку через компьютер
◈ Подключите смартфон к ПК при помощи кабеля.
◈ Отключите опцию Найти iPhone по пути Настройки – Учетная запись Apple ID – Локатор – Найти iPhone.
◈ Запустите Finder (для Mac) или iTunes (для Windows).
◈ Зажмите клавишу Option (Alt) на клавиатуре Mac или SHIFT на Windows и нажмите кнопку Восстановить iPhone….
◈ В открывшемся окне выберите загруженный файл прошивки iOS 16.5.
◈ Нажмите кнопку Восстановить и дождитесь окончания процесса.
Дальше останется только восстановить резервную копию с компьютера или облака. Как вернуть приложения из бекапа, можно прочитать в нашей отдельной инструкции.
В закладки
Артём Баусов
Главный по новостям, кликбейту и опечаткам. Люблю электротехнику и занимаюсь огненной магией. Telegram: @TemaBausov